
Why narrowing the VR field is a good idea.
(24.10.2019)
E-mail to arnfinn.christensen@gmail.com if you have comments/suggestions to improvements in this blog entry!
Declaration: This posting has a CGI (Cranky Geezer-Index) of 20.![]()
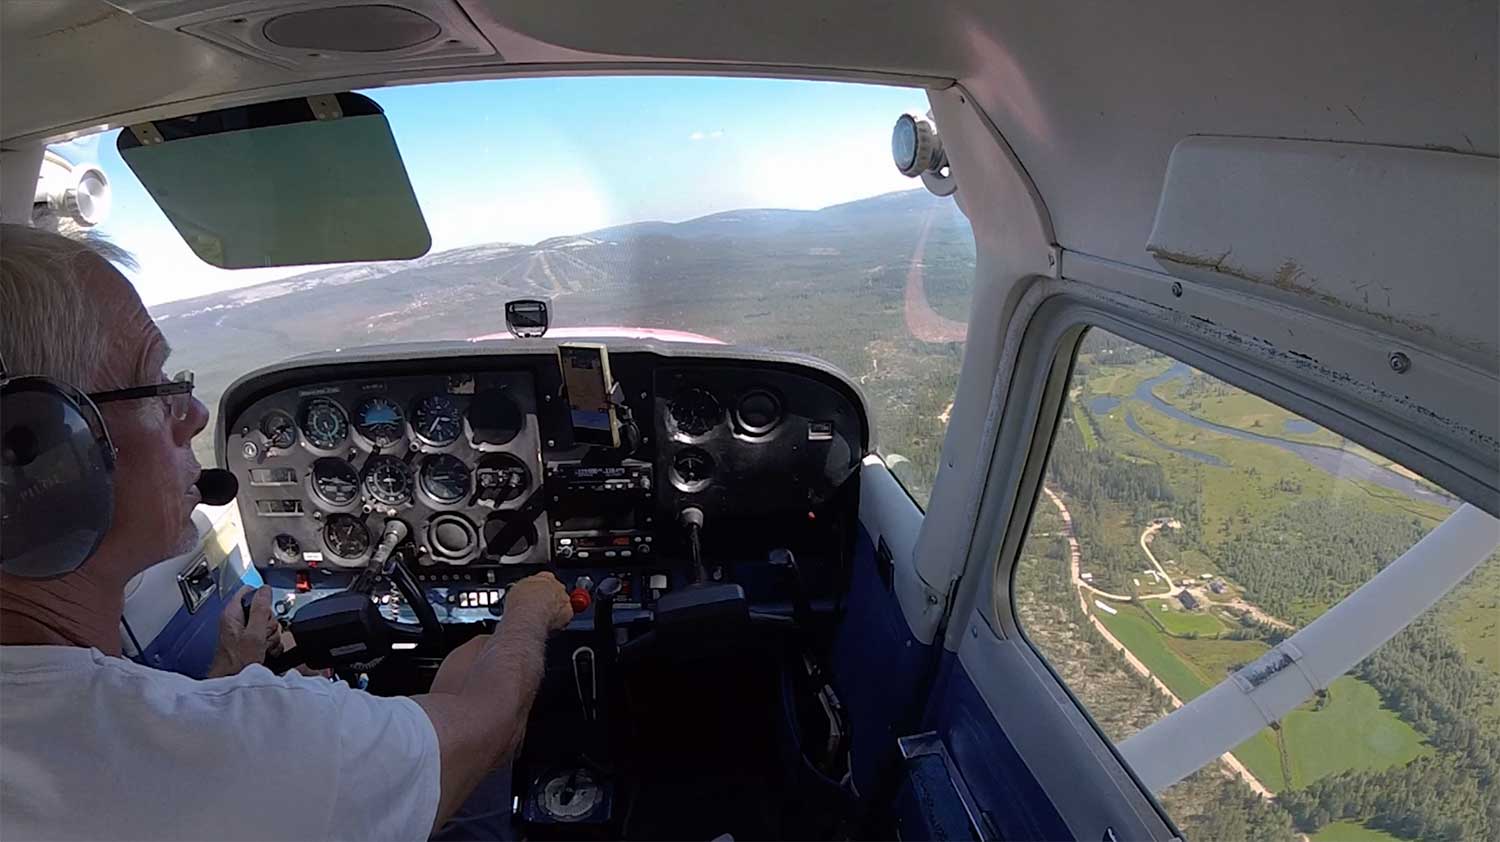 3D VR-video give you an immersive you-are-there-experience, even if the format is still lacking resolution. This is a scene from one the author´s videos, where you take the passenger´s seat in a sight-seeing flight over one of Norway´s most remote bush strips, where bear and wolves roam. See the video in 3D on YouTube VR with any supported VR-set, like Oculus Go/Quest/Rift, Vive or PSVR.
Traditional 360 degree VR is very graphically demanding. New 6 DOF standalone headsets like Oculus Quest might justify such an extravaganza, as you will probably move in all directions when standing and walking in games. But video? How often do you look behind you in a video? 360 degree VR video is an enormous waste of pixels, with a very blurred VR world indeed, especially in 3D, where you have to share the available pixels between left and right images.
Also, showing every angle is unnecessary for the video author who wants to focus attention on what is important. It is contra productive to good storytelling, only useful for passive documenting.
Google addressed the pixel overkill of VR 360 with their VR 180 format, but even that format is wasting pixels in my opinion – for three reasons.
First, VR180 uses fisheye lenses to cover the entire half-globe vision field, with no stitching of multi-camera images. That is an advantage, but fisheye lenses gradually lose resolution when you move away from the center of the image because the vision field is a half-sphere but is projected on the flat surface of the image sensor. Expensive VR 360 setups avoid that in the (most important) horizontal direction by using many cameras and narrower vertical segments with stitching.
Second, using only two forward-pointing fisheye lenses makes the 3D-effect progressively weaker to the sides and approaching zero at the outer left and right horizontal limits of the VR 180 image.
Third, even 180 degrees of vision is wide-angle overkill, in my opinion. How often do you stretch your neck to look straight up? How often do you brush your chin against your chest to enjoy the camera´s tripod or the shoes of the photographer? And what will you really miss at the extreme left and right edges of the picture? You seldom need those outer regions to feel immersed. The storytelling videographer has placed the interesting stuff near the center for a reason!
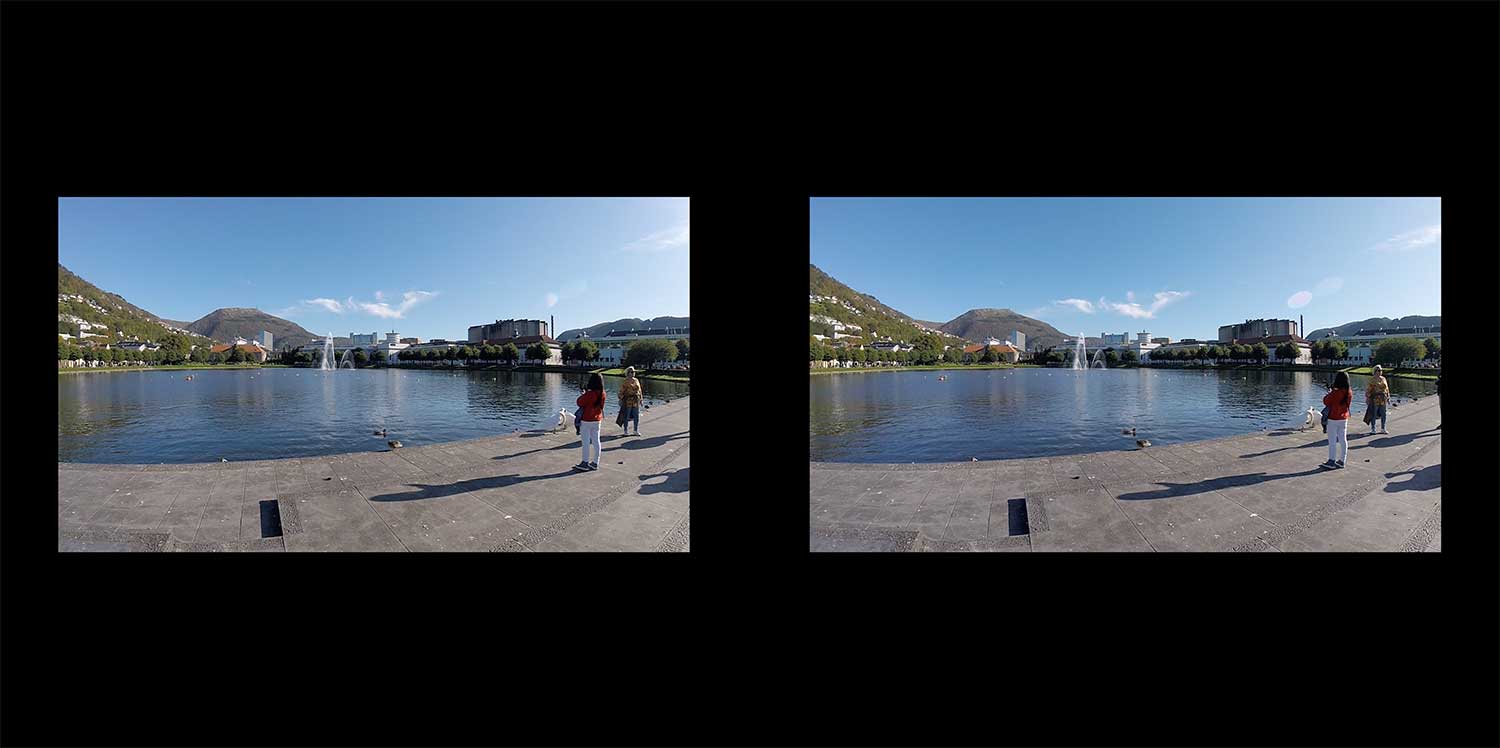 Screendump of VR120 stereo images in the 4K VR180 format, showing cropped black borders. The scene is from the Norwegian town Bergen, a popular tourist destination in summer. See the video in 3D on YouTube VR with any supported VR-set, like Oculus Go/Quest/Rift, Vive or PSVR.
I suggest that we limit the vision field even more and establish a new video format, which I call «Video 120». It should have an ordinary 16:9 format, stretched out about 120 degrees horizontally and 90 degrees vertically. Such a format would give the impact of 3D Imax in a VR headset with sufficient resolution, but reserve the pixels for the vision field we actually need to feel immersed – and with a three-fold increase in sharpness, compared to VR 180.
Also, both resolution and 3D effect will not degrade too much towards the edges within the image frame.
I have experimented with such a format. However, I am of course in no position to establish new standards. Therefore, I have made some videos in the VR180 format, but with pixel-wasting black borders around the 120 degree field. It does not show the potential gain in sharpness, but it demonstrates that 120 degrees is enough to give you that immersive «you are there»-experience.
Furthermore, there is one more advantage of this VR 120 format. You can use two ordinary GoPro cameras. You do not need dedicated, more expensive VR-cameras. My experience is that if you use mass-produced technology with a large user-base, you get more reliable and easily replaceable technology than proprietary equipment produced in smaller numbers.
 VR120 setup with two GoPro Hero5 cameras and Zoom H2N in spatial audio mode.
I have started out with two GoPro 5 Session cameras, which I got really cheap from a local shop of the type that sells everything from screwdrivers to coffee mugs (Clas Ohlsson, well known in Scandinavia), because these cameras were discontinued models. Newer action cameras will of course give higher future-proof resolutions and framerates for upcoming 8K VR glasses.
I have set up the cameras to record in «widescreen» mode (16:9) (NB! Do not use «super-wide», which stretches the sides to give a false panorama-effect and distorts the image!).
I record with 50 frames per second. Then, their maximum resolution is full HD, 1920x1080. That is all you need in «VR120» with the resolution of today’s VR headsets like Oculus Go (which I use, as video has no use of 6 DOF) and Oculus Quest.
There are two reasons for using 50 and not 25 (60 or 30 for you in the US) frame rates. The two cameras are obviously not synced electronically in any way, so I need high enough time resolution to avoid 3D depth-errors because the left and right images were shot at slightly different times.
With 25/30 fps, the maximum possible error will be double that of 50/60 fps. That is enough to give such errors. Even 50/60 fps can give errors if objects are moving fast, but luckily, the human brain is very good at correcting for such small deviations. We see what we want to see, which is an advantage for VR 3D-photographers, but a disadvantage for witnesses in court!
I have mounted the two GoPro 5 Session cameras and a Zoom H2N audio recorder on a common rail which is again mounted on a tripod. When recording a new scene, I announce the scene and make a visible clap in front of the cameras to get both visual and audio sync.
The Zoom H2N is set to four-channel «Spatial Audio», the entry-level to «ambisonic» audio, where the surround audio field follows your head movements in the VR headset. See my separate posting for more details!
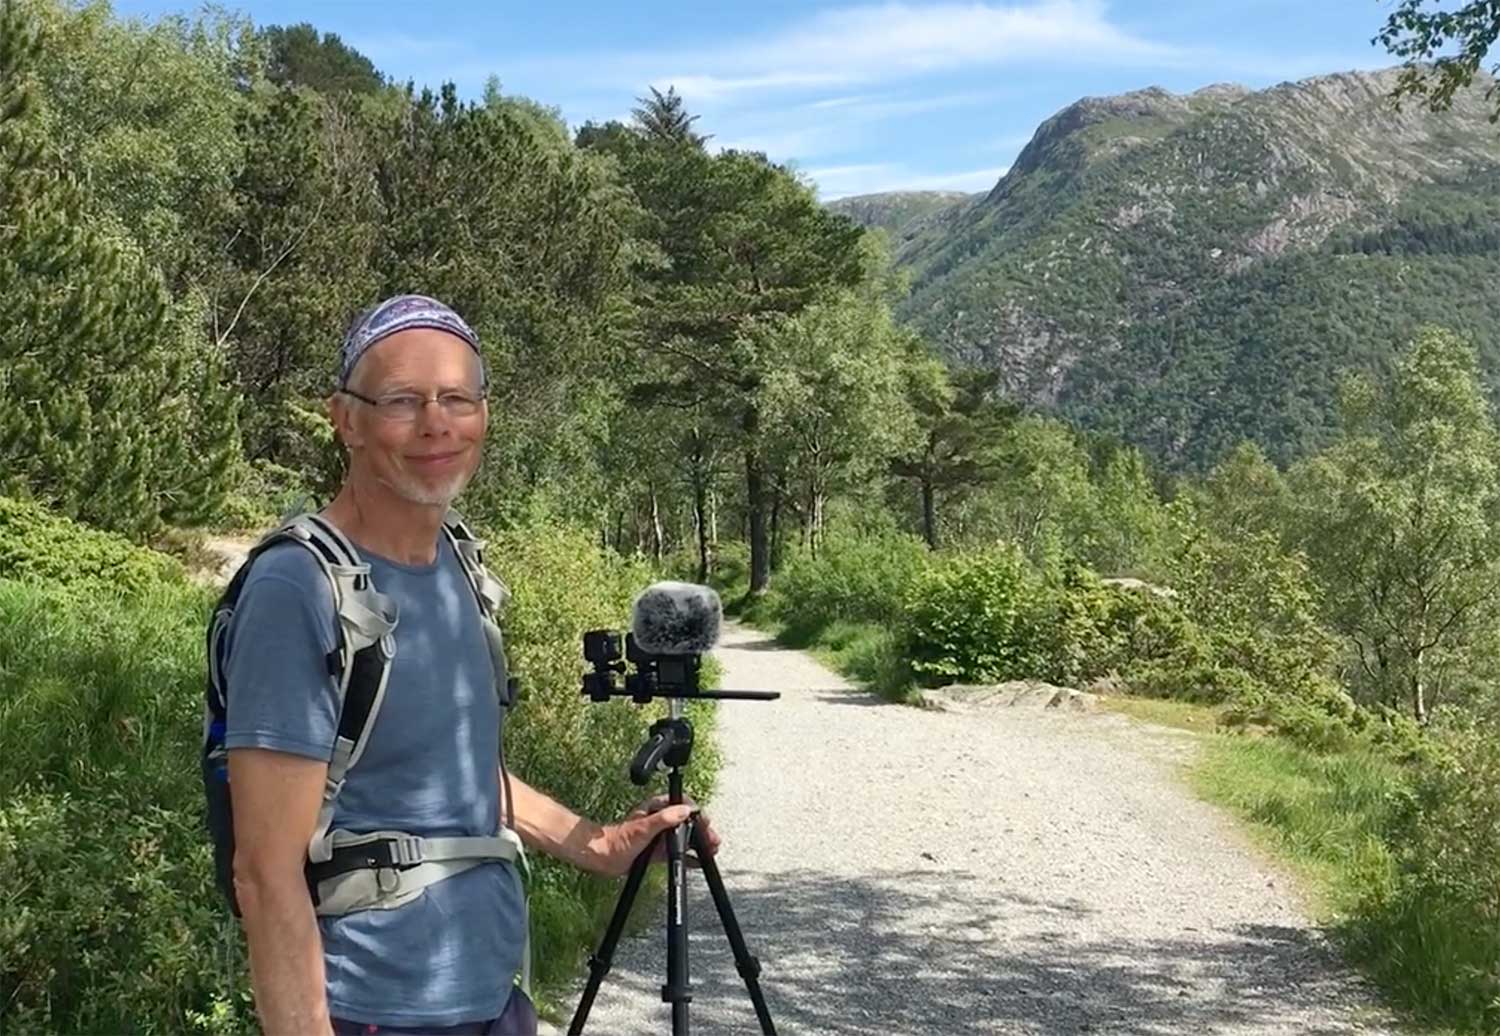 The author with the VR120 setup on location in beautiful Bergen. (Photo: Berit Hartveit)
Most of the following will also be applicable to editing of ordinary VR 180 footage.
In Adobe Premiere CC 2019, I use a sequence sized 3480x1920 – two left-right side-by-side square 1920 pixels video fields. Left and right images are placed at positions 960 and 2880 and scaled down to 88%, which gives a horizontal angle a little over 120 degrees, a compromise between loss of resolution in downscaling and correct angular visual field. (The correct scale is about 0,86.)
I could have used 5.7 K resolution and avoided the downscaling for a little better resolution, but Oculus Go only supports 25/30 fps at that native resolution. When things move close and fast in the scene, my experience is that the movement becomes too jerky. But in slow, scenic videos, this frame rate and resolution could be better suited.
Even if I try to align the cameras on the common rail, they are sometimes pointing in slightly different directions and even rotations.
This, I correct by comparing them in Premiere. You can use the 3D anaglyph (red-blue) monitor mode. Right/control-click the monitor window and choose «VR Video/Enable». Then, you can easily see if details in the far distance is not properly aligned. (They should be in perfect register, as they are «infinity» of the 3D distance scale.) Adjust them with the «motion»-controllers for either left or right image in vertical/horizontal position and rotation until the background is best possibly aligned.
If you think the misaligned outer frame borders then becomes a problem, then use a mask on a higher video track that crops the outer edges slightly to hide those misalignments.
The anaglyph 3D monitor is of course also useful if you want a 3D preview and have red-blue 3D-glasses.
You can make the text (or figures, for that sake) in Photoshop or other image program and export it in a format with transparency (png, psd or tiff). You can also make it with Premiere´s own text generator.
Align the text in the horizontal and vertical middle on it´s own track in Premiere above the 3D video tracks. (With 3480x1920 resolution, the horizontal and vertical middle points will become 1920 and 960,(always half the horizontal resolution, as movie clips by default have their anchor point in the middle.)
Apply the filter "Immersive Video/VR Plane to Sphere." This filter does two things: It makes two instances of the text/graphics and places them in the right position over left and right 3D-image. It gives a spherical distortion to the text/graphics that will make them look straight, not curved, on the basically curved VR image sphere.
This filter also allows you to rotate ("Rotate Source") and scale ("Scale (Degrees)") the text or figure. You can also move the text or figure in the 3D world in two ways:
The video output in «widescreen» mode from the GoPro cameras is approximately 120 degrees horizontal and 70 degrees vertical. You will get some fisheye distortion furthest away from image center. That manifests most clearly as curving lines, for example if house walls or trees are near the left or right edges or a left-right-running sidewalk is near the bottom edge.
The distortion appears because the VR180 format requires equirectangular conversion. This is done in software in dedicated VR180 cameras. Equirectangular projection is better known as Mercator projection for maps – the further away from the vertical center of the image, the more horizontally stretched the image is. The globular form of the Earth (and the fisheye image) is converted to a square image where the curved meridians – and curved lines in the fisheye image – become straight lines.
Usually, I accept the distortion in the GoPro footage. Most of the time, you will watch near the middle of the VR field, and many scenes do not have revealing vertical lines at all.
But if you want to avoid the distortion and do the conversion to equirectangular, you have some extra work in front of you, because you do not have a full 180 degree fisheye image that most converters are made for.
You could do the conversion selectively to the scenes where the distortion of lines are most prominent. One simple solution is to use the filter "Distort/Lens Distortion" and slide the "Curvature" parameter towards minus values until the lines are straight at the horizontal edges. But then, you will lose the leftmost and rightmost parts of the image.
I use the «spatial audio» setting on Zoom H2N, which is the same as the AmbiX standard. (See my separate posting on ambisonic sound editing the simple way.)
Adobe Premiere Pro has good support for VR video – both for visuals and sound. Here are some advices for trouble-free VR180/AmbiX editing.
First – set up Premiere to treat 4 channel AmbiX files correctly. Under Preferences/Timeline/Default Audio Tracks, select «Adaptive» from the «Multichannel Mono Media» drop-down menu.
Otherwise, your 4 channel AmbiX will distribute over separate audio tracks in the timeline instead of one 4-channel track. When you export your VR movies in Adobe Premiere Pro, it is very important to use the right preset. If you don´t, you risk that the file will be a null byte empty export.
For «Format», choose «H264», and for «Preset» (very important to get the right meta-data with your file and not get an empty file), choose one of the VR-presets with «ambisonics» in it´s name. Then, change the framerate, VR180 and other parameters to suite your project.
Also, for the «Audio»-parameters in «Export»:
For «Bitrate» choose «512 kilobit per second» (to make it YouTube-compatible) For «Channels», choose «4.0», not «Stereo» Under «Ambisonics», check «Audio Is Ambisonics».
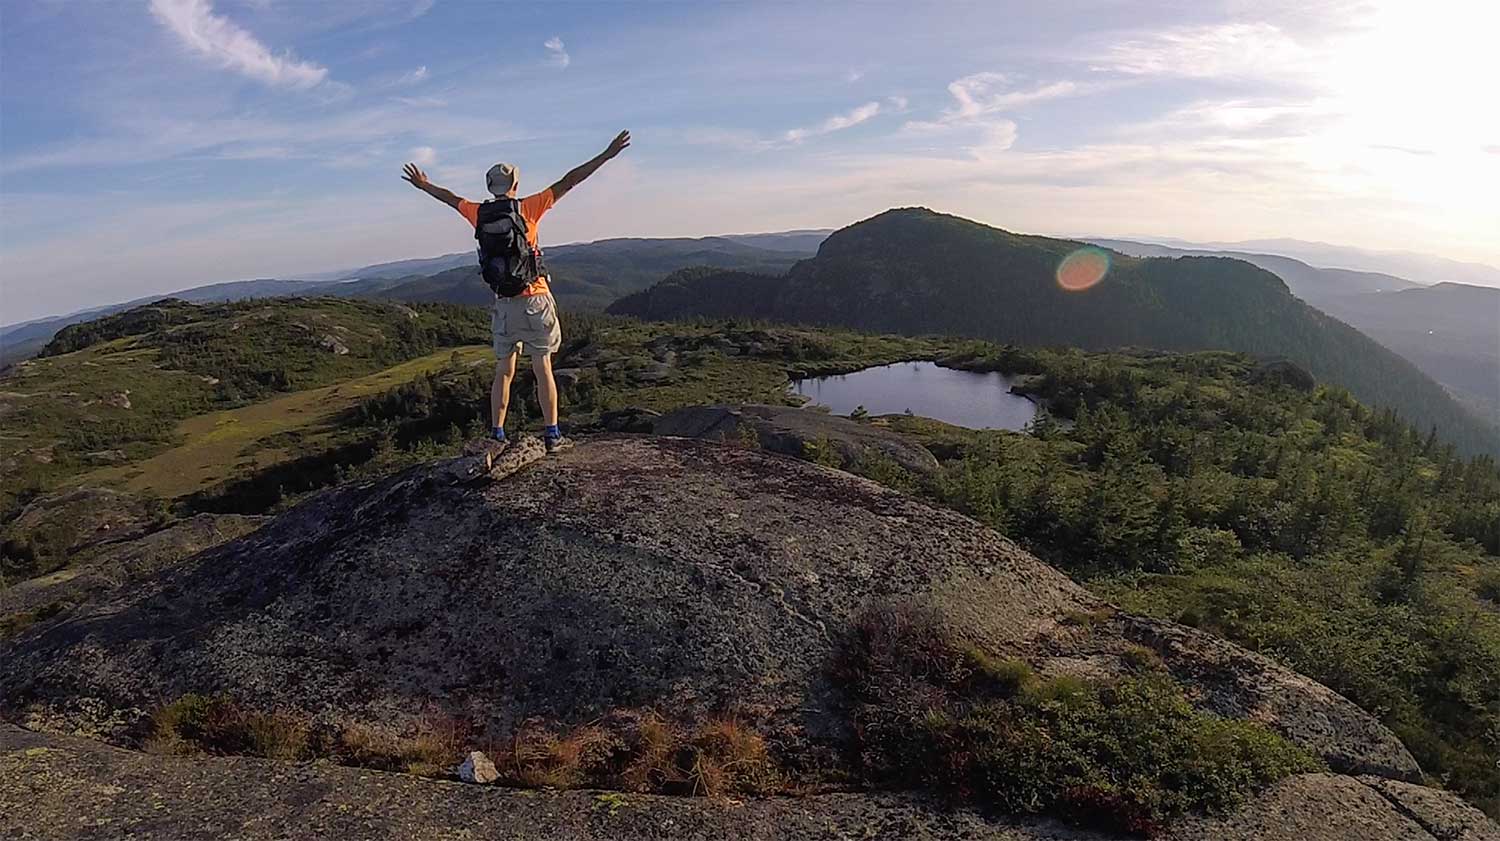 Screenshot from my 3D VR120 video showing the Skrim mountains close to my hometown Kongsberg. See the video in 3D on YouTube VR with any supported VR-set, like Oculus Go/Quest/Rift, Vive or PSVR.
Arnfinn Sørensen 2019. Public domain – but please credit source and include link.